Pages

Showing posts with label stitching. Show all posts

Monday, July 7, 2014

MAP - A Layout for Kreative Koncepts

 
I'm so excited to announce that I found a super inspiration blog, called Kreative Koncepts!  
kreative koncepts
I decided to jump right in and do a layout for their current challenge:
http://blog.scrapfriends.com.au/2014/07/sketch-challenge-27.html
Everyone knows that I love a sketch with 2 or more photos, so I didn't need to make any adjustments to this one!  Here is my sweet boy, featured in a little baseball outfit!
He's the Most Adorable Player, the MAP! 

Saturday, November 16, 2013

WILD at heart: A Layout for Sketch - N - Scrap


I created this layout, "Wild at Heart" for the sketch challenge at Sketch N Scrap!  This is the first time I've entered a challenge on the blog, and I was excited to discover it! 
Here is the original sketch from Sketch N Scrap, #45
 

I was thrilled to be able to use 4 photos on this sketch, as I am 3 years behind chronologically, in scrapping my youngest's memorable events!  LOL!
 
To create this layout, I used these products:
*My Mind's Eye
*Crate Paper button brads
* Me and My Big Idea red foil chipboard
*Simple Stories journaling scrap
* Sew Easy stitching
* embroidery floss, apple brads, buttons from my stash
 
Please leave  me a comment - I love to read them! 

Friday, April 26, 2013

paint: A Layout for April Week #4 for Let's Get Sketchy


My Little Bug loves to put everything in his mouth.  He decided to taste the fingerpaints, smell them, rub them on his face, and even managed to do some painting!

Here is the original sketch from Let's Get Sketchy:

 
I was able to pack a lot of details into this layout, and 3 photos of my little painter!

Thursday, March 28, 2013

Brown-Eyed: A Layout for Sketches in Thyme


I created this 2-page layout for Sketch #106  at Sketches in Thyme! Here is the original sketch I worked from:


I ended up using 4 photos, and turning the first one into 2 pieces.  I hope you like all my brown-eyed babies!
 

Authentic Boy: A Layout for Scrapping Everyday Miracles


March Sketch Challenge: And the twist - buttons!
 

I had a blast with this sketch - so many elements and so many photos!  I really need to use sketches like this with 4 photos because I take so many shots of my family, that even when I scrap a few of each event, I still have too many!  LOL! 
Be sure to visit Scrapping Everyday Miracles for challenges, tutorials and lots of Miracles!  

Thursday, March 21, 2013

Oscar: A Layout for Sketches in Thyme


Here is the original sketch #104:
 
My goal for 2013 is to use the supplies and collections I already have, and only purchase adhesives and photo prints!  So, everything in my layout is from my stash!  I had big fun with this sketch, and chose to take 1 great photo of Oscar the mule and crop it into 6 equal parts!  I used fibers, twines, ribbon ends, and some old paper scraps!  It feels good to use what I have and to be a good steward of my blessings!

Monday, March 18, 2013

Candy Coated!


It is pretty rare that I just give my youngest child candy without him earning it, or it being a special holiday, but he received this blue-raspberry Blow Pop from my mom, his La La.  The condition to be be able to eat it, was that he had to eat it in the bathtub! I loved layering these patterned papers in shades of aqua and turquoise by My Mind's Eye, and using American Crafts thickers, as well as a Marvy Uchida heart punch! 
 
**Please enter my 750 Followers Giveaway up above! -- The tab is located just below my pink and green logo!**

Friday, February 22, 2013

Let's Get Sketchy Feb. Week 1


Here is the original sketch:
 
I used these products and supplies:
*Fancy Pants Summer's End Collection
*The Paper Studio KRAFT stack
*Close To My Heart Waxy Flax
*American Crafts black thickers
*Recollections cardstock
 
Enjoy!

Sketches in Thyme # 101 and 102

I present my layout for Sketches in Thyme #101:
 

Sketches in Thyme # 101

________________________________________________________________________________

And below, I present Sketches in Thyme #102:
 
 
The original sketch #102:
 
In these layouts, I showcased photos from a trip my son and I took to a friend's small home farm!  We both love animals, and he loved getting so up close and personal!
 
This year, 2013, my goal is to basically use what I already have in my scrapbook stash, and only purchase tape runners, glues and adhesives!  So, here is a list of the products and supplies I used:
 
  • Recollections chocolate cardstock
  • The Paper Studio KRAFT stack
  • Close To My Heart houndstooth print paper, wooden die cuts, and Waxy Flax
  • Fancy Pants Summer's End collection
  • My Mind's Eye burlap twine
  • American Crafts black flat thickers
  • K and Company woodgrain title chips
Enjoy!  **And please enter my 750 Followers Giveaway! It's up there on a tab!**


Tuesday, January 1, 2013

My Mind's Eye December Sketch Challenge


My Mind's Eye is my very favorite scrapbook collection company, as I just love their style!  Their papers really seem to fit my life!  So, Here is my take on the December Sketch Challenge!  I used only 1 non-MME product, and that is the chipboard font for the title, "So Adored."  All other pieces of my layout are from the Follow Your Heart Collection! 
 
Here is the original sketch we were challenged to work with:
 
 And here is my super fun take on the sketch!
 
 
I distressd, hand stitched with MME twine, and even used the collection name, "Follow Your Heart," in my layout! 
These are photos of my sweet boy playing in the bathtub - still one of his favorite activities!
 

Thursday, December 27, 2012

4 Crafty Chicks Challenge # 122: Color Combo

It's me again!  This is my last challenge as a guest designer with 4 Crafty Chicks for the month of December!  Our challenge was to use the provided color combo in a project!  Can you guess the 4 colors?  (Black, gray, white, canary yellow!) 


To create this layout, I used these products & tools:
My Mind's Eye Follow Your Heart Be Amazing Paper & brads
My Mind's Eye Miss Caroline paper
7 Gypsies Avignon paper
Bazzill Basics Lemon Garden embossed cardstock
thickers by American Crafts "rocketeer"
Mon Ami Gabby yellow Crepe Paper
XXL Glue Dots
Quick Quotes Powderpuff Lemonade Chalking ink
Stazon Jet Black ink
metal frame by Close To My Heart
CTMH Paper Shapes flutter butterflies
Apple Barrel Acrylic paint in white
Foam dots
embroidery floss
needle
We R Memory Keepers paper piercer
Prima handheld comfort distressing tool

Visit 4 Crafty Chicks Challenge blog and get crafty!


Friday, December 21, 2012

Lots of Gold! (10 Yellow Elements!)


5 Golden Rings.....  The 5th Day of Christmas celebration at Frosted Designs is to include 5 or more gold or yellow elements on your project!  I have included yellow printed cardstock, 2 types of yellow ribbon, yellow cardstock matte underneath my photo, yellow flowers, yellow brads, yellow jewels, a yellow BINGO card, yellow stitching, and yellow title foam stickers!  That's 10 yellow elements!!!

Merry Christmas!

4+ Patterned Papers for Frosted Designs!


For the 4th Day of Christmas event at Frosted Designs, the challenge was to use at least 4 different patterned papers!  I love this and do it often, so I was able to use 6 patterned papers, all from My Mind's Eye! 
 
**I'm also doing a giveaway on my blog, so scroll until you find the Calendar Kit Giveaway!**
Merry cHRISTMAS!

Thursday, December 20, 2012

4 Crafty Chicks Challenge #121: Make your own patterned paper

This week at 4 Crafty Chicks Challenge, the assignment was to make your own patterned paper and then create with it!  I'm a guest designer the month of December, and I really enjoyed this challenge!  I love to get messy!
Here is my completed piece of homemade patterned paper!  I used recycled/repurposed things to make my patterns, that otherwise would have been thrown away! 

 
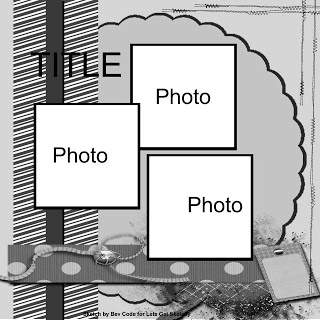
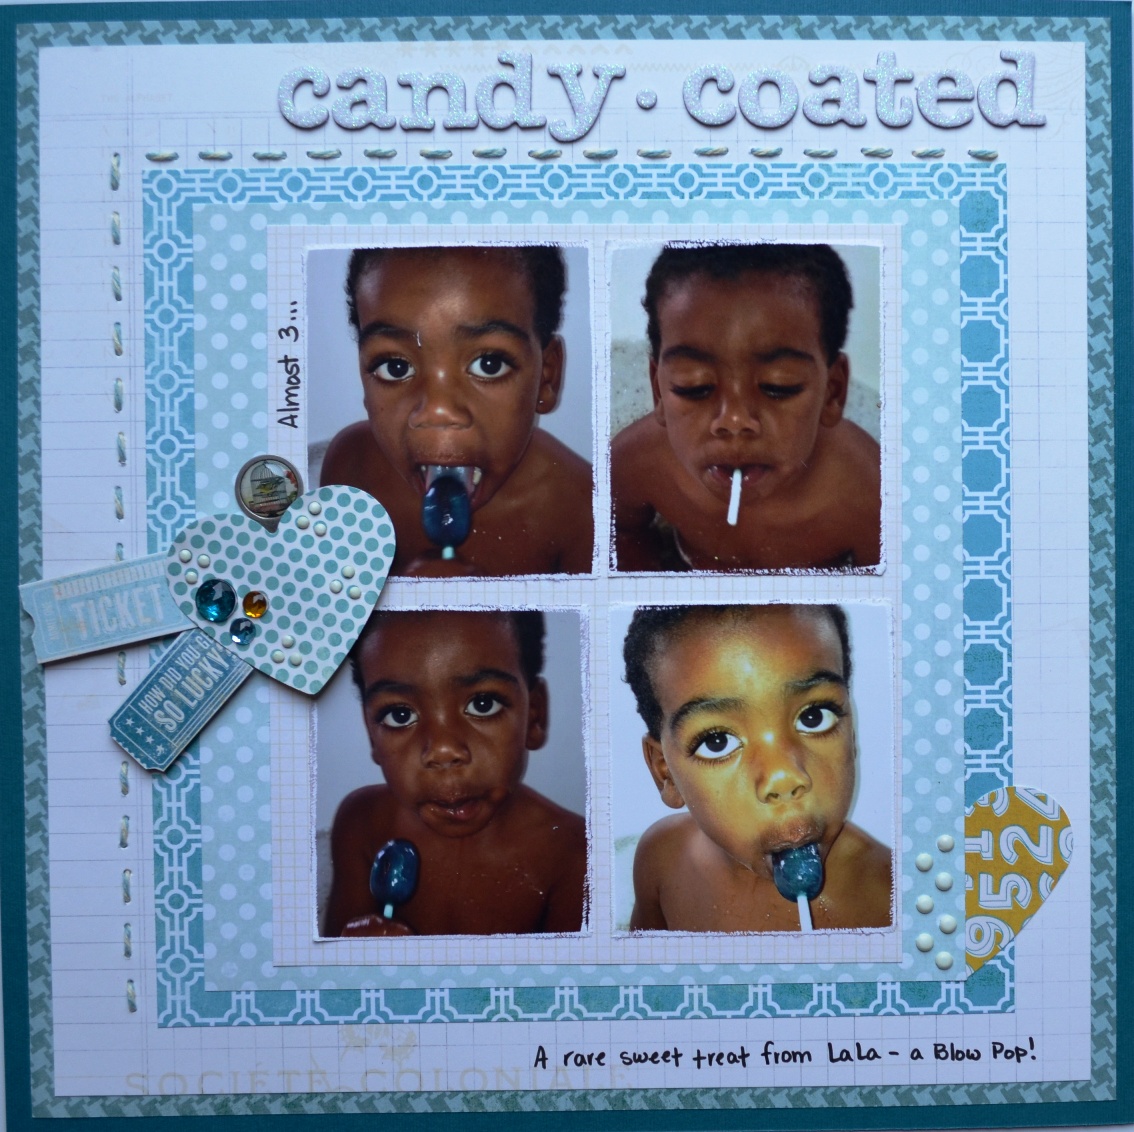
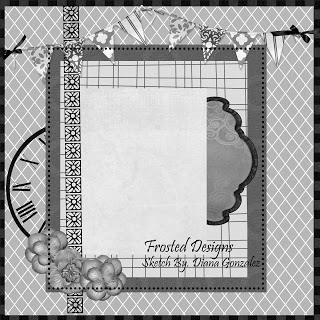
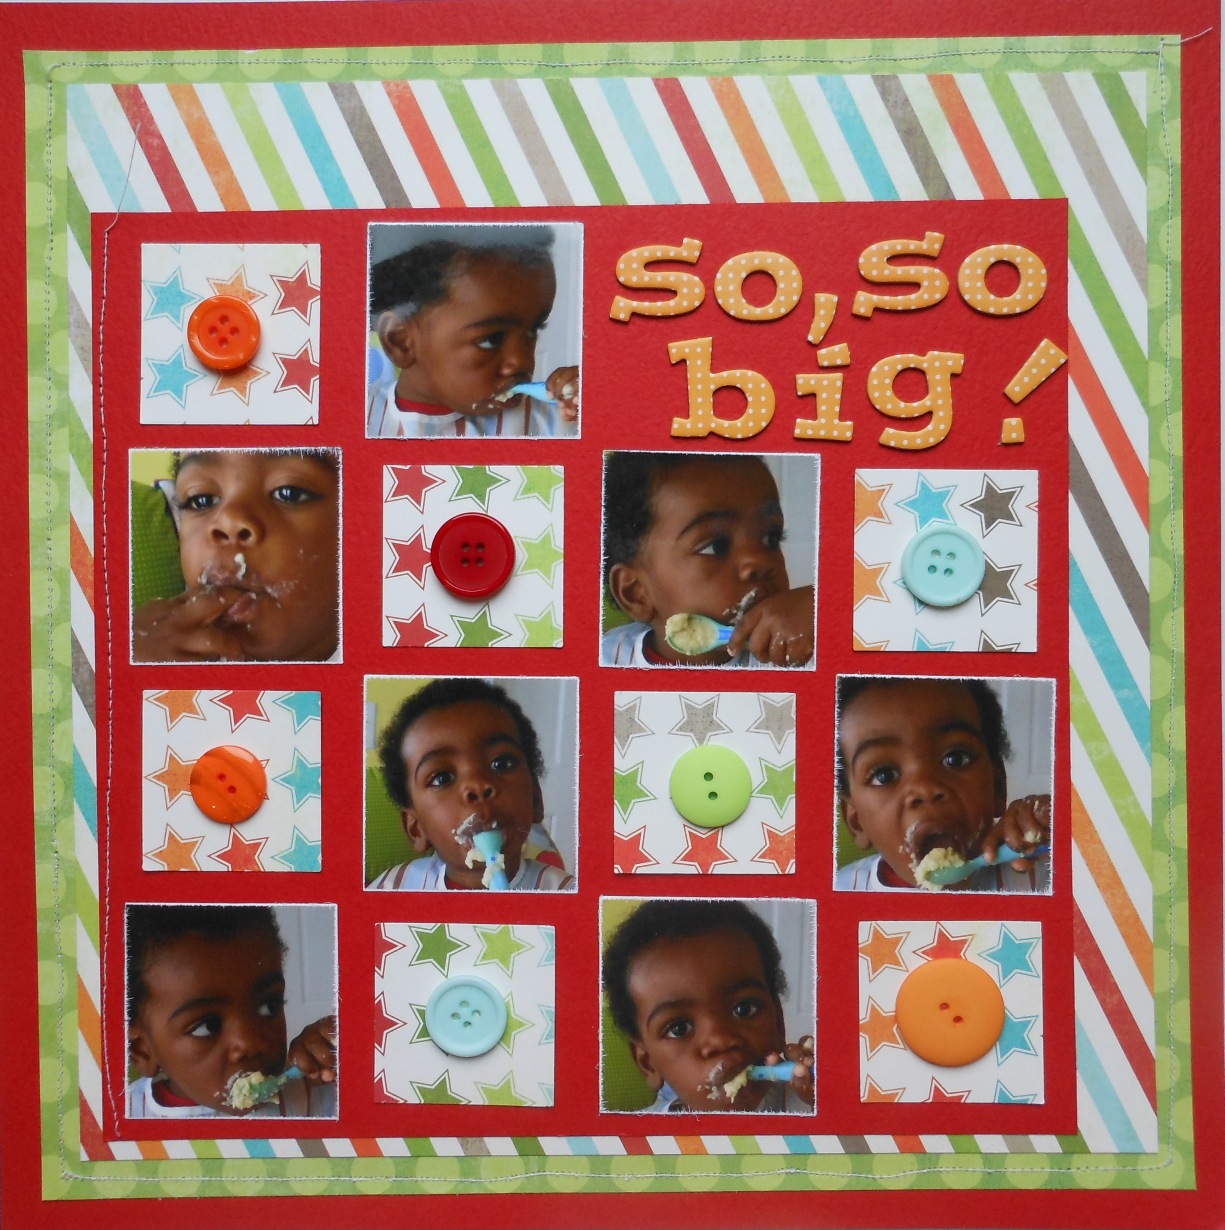
And here is the layout I created with my new paper!


Here is a look at the recycled materials I used to add the various textures and patterns to my cardstock.
 
And add a nice big squeeze of white acrylic paint to work with:
 
Dab that paint all over the bubble surface of the bubblewrap with a sponge.
 
Place that face down onto your darker cardstock anywhere you like - I chose an angled tilt and off-center.
 
Next, I sponged white paint all over the foam slats of this little protective cover that Asian Pears come wrapped in, and placed it face down on my cardstock, too!
 
Try to keep the various items you are placing on the cardstock still, without sliding them, as you will end up with a big white smudge rather than a print/pattern.
Here's how that came out.  You can turn the foam inside-out and you will have the other diorection of the weave pattern.
 
Next, I added in a shimmery blue acrylic paint to coordinate with my photo.
I sponged that all over one side of the plastic rings that I saved from my son's individual juice bottles (I don't normally buy these, but he was very sick, and he needed the fluids!)

 
I placed this face down on the paper and pressed firmly!

 
Next, I sponged the entire corrugated side of this little lightbulb box insert with a mixture of the blue and white paints, and reapeated my face-down press!


I used these products and tools to create this patterned paper & layout:
American Crafts Metropolitan City Park paper
Apple Barrel Acrylic Paint in white
Folkart acrylic paint in Metallic Blue Sapphire
Magic Scraps Felt Die Cut Shapes "All Boy"
Tim Holtz ideo-ology memo pins
Mon Ami Gabby Crepe Paper
XXL Glue Dots
Bazzill Basics Classic Blue & Handsome cardstock
Michaels ribbon
Adorn It font stickers
CTMH distressing ink in brown
thickers vinyl white letters
Old tags, one of which was from a sweater I recently purchased
foam cover from an Asian Pear
Corrugated cardboard insert from a lightbulb box
plastic separating rings from juice bottles for kids
bubblewrap
embroidery floss


Wednesday, November 7, 2012

Winter: A Layout for Frosted Designs & Bird is The Word


I work with lots of sketches, one because I love them, and two because I have so many pics to scrap that I don't have time to spend coming up with the layout on my own!  I loved all of the elements of this sketch, and was able to incorporate lots of techniques.
 
I also entered this layout in the Bird is the Word challenge for October 22, 2012: Spring/Summer/Winter/Fall
 
Here is their site badge if you want to pop over:
 
 
I used "Winter" for my title, and found a great quote about snowflakes! 
For this layout, I used these products and tools:


Marvy Uchida snowflake punches
 
Basic Grey tiny brads
 
embroidery floss
 
Ribbon and foam dots from Michaels Craft Store
 
 ***Merry Christmas 2012!***


Tuesday, October 30, 2012

We: A Layout for Let's Get Sketchy


I love this photo of my sweet husband and our youngest son holding hands and walking away from me.  I created this layout based on the October Week 4 Sketch (Sketch #34) at Let's Get Skletchy! I love all of the opportunities to use geometric shapes, and focus on 1 special photo!  I distressed heavily around the edges of the first 2 layers of paper, and added some whimsy with flax stitching!
 
I used these products & tools:
Bo Bunny paper
Bazzill cardstock
The Paper Studio chipboard font letters
Martha Stewart punch
Sew Easy Tool
October Afternoon font stickers
We R Memory Keepers XActo knife

Sunday, April 29, 2012

Get Up: Simple Stories


This is the first layout in a series I will be posting with my new favorite manufacturer: Simple Stories! These next few posts feature the Happy Day line, which suggests birthday, but I was able to use this versatile collection for a big photo shoot at our local park!  I also used Close To My Heart chocolate cardstock and twill ribbon, along with American Crafts thickers.  The chocolate ric rac is from Wal Mart, and the rough burlap-textured twine was purchased in a grab box at the 2011 Creating Keeepsakes convention.  Of course, I distressed as many edges as the skin on my fingers would stand! LOL! 
Roberta
750 Followers Giveaway
 http://thepapercraftingleague.blogspot.com/p/750-followers-giveaway...

Friday, April 20, 2012

So, So Big!


So, So Big!   I am famous for taking 50-75 photos of my son, when probably a handful would suffice, but I feel like I never know what I might get in the photos if I take a bunch!  Subtle differences, tiny movements, a nuance of an expression.....precious are those photo frames!  I am also famous for not measuring anything on my layouts, and being more of an "eyeballer" when placing elements!  So, there you have it!  Add in diagonal stripes on patterned paper, and here is what you get!  I didn't journal, but basically, Ezra is feeding himself completely without my help or hovering! 

750 Followers Giveaway!
**Click on the tab right below the word "League" in my logo at the top of the blog!**

Monday, February 13, 2012

I Love U

Can you tell by this layout and my recent posts, well, all of my posts, what I am passionate about? You guessed it - being a full-time, all the time, blessed stay at home mom! I take mothering very seriously, and believe it is so important, especially in the early years. Everyday, my son is learning about God, himself, the world, other people, and how he should behave in it! I am so thankful to be able to witness and take part in these everyday events! This layout was inspired by the Scrapping Everyday Miracles challenge to scrap what I am passionate about, and that is being a lifetime mother! In this layout, based on the sketch by Creative Scrappers, is my youngest of 3 boys!
Besides my relationship with God and my husband, this little pumpkin is the love of my life. He was born in my heart, and wanted and prayed for for many years.
We love to celebrate the 4 seasons, and Autumn is one of our favorites! Our family is in love with life!
To create this layout, I used lots of patterned paper in layers, from several companies! 5 layers, to be exact, for the CES Challenge! I added lots of hearts to coordinate with the theme of my laytout, for the Fairy Tale Challenge, the Fussy and Fancy Challenge, and the Totally Gorjuss challenge! I love to use hearts anyway, so this was right up my alley! Next, I was able to finally use one of my most "loved" Christmas presents, the Sew Easy tool, in a few places on the layout to add some texture with bright orange stitches, thanks to the inspiration of Craft Your Days Away challenge!
I am entering this layout in these super challenges: Creative Scrappers Sketch #194

I used these products in this layout: We R memory Keepers Autumn Splendor, CTMH, Pink Paislee, DCWV, EK Success, Sew Easy, Making Memories Scrapbook Stitches

Sunday, February 5, 2012

Ribbon Scrap Cardstock Tutorial

This is my pile of ribbon scraps! I love ribbon, and my absolute favorite pattern is polka dots! For your first step, select coordinating ribbon scraps, about 10-12, in varying lengths!
You will need 1 sheet of black cardstock, scissors, a hair straightener, adhesive, tape, and a sewing machine ready to sew! (I chose black cardstock because it highlighted the bright colors in my ribbon scraps.) I spread out my scraps of ribbon, and trimmed their ends on a 45 degree angle. I then ran any creased or wrinkled scraps through my heated hair straightener.
Next, use permanent adhesive, and arrange and stick down your scraps. I alternated long and short pieces, and directions of the angles I cut earlier. I allowed my scraps to hang off the bottom of my page, as in a later step I will be trimming these edges.
Next I stitched each scrap of ribbon straight down the center, using the polka dots as an aid!
I trimmed threads close, and taped down the free ends on the back of the black cardstock.
Finally, I used my sharpest scissors to trim the overhanging edges of the ribbon from the bottom edge of the cardstock. Voila! You have created a scrap ribbon sheet you can use for scrapbooking, cardmaking and more!
Here is a final close-up of my stitched ribbon scrap cardstock project. I hope it will inspire you to use your ribbon scraps in new ways!
Please visit Frosted Designs for challenges, sketches, card sketches, and fun tutorials!